Your cart (0)
Your cart is empty
Tax included and shipping calculated at checkout
Your cart is empty
Tax included and shipping calculated at checkout

To level a travel trailer on uneven ground, you must level side to side first using leveling blocks, then level front to back with the tongue jack, and stabilize the trailer last. Skipping steps can cause instability, structural stress, or appliance failure.
Whether you’re setting up a compact 16 ft camper weight unit or wrangling a 30 foot rv weight beast, the fundamentals stay the same, but the consequences of doing it wrong get more expensive as your rig gets bigger.
Let’s be real: leveling isn’t just about keeping your coffee from sliding across the table (though that’s annoying). An unlevel trailer puts serious stress on your frame, suspension, and chassis. Over time, this can lead to cracks, warping, and structural damage that’ll cost you thousands to repair.
Your fridge? It needs to be level to function properly. Most RV refrigerators are absorption-style units that rely on gravity and proper coolant flow. Run them on a tilt for too long, and you’re looking at permanent damage. Same goes for your slide-outs, extending them on an unlevel surface can bend the mechanism or damage the seals.
For an off-road travel trailer designed to handle rough terrain, proper leveling is even more critical. You’re already putting extra stress on the frame by venturing off the beaten path. Setting up camp on a slope without proper leveling? That’s asking for trouble.
And here’s the thing: the average travel trailer weights range from around 3,000 pounds for smaller models up to 10,000+ pounds for larger units. That’s a lot of force concentrated on your stabilizer jacks and leveling system when you’re parked on uneven ground. Get it wrong, and you’re risking a bent jack, cracked frame, or worse.
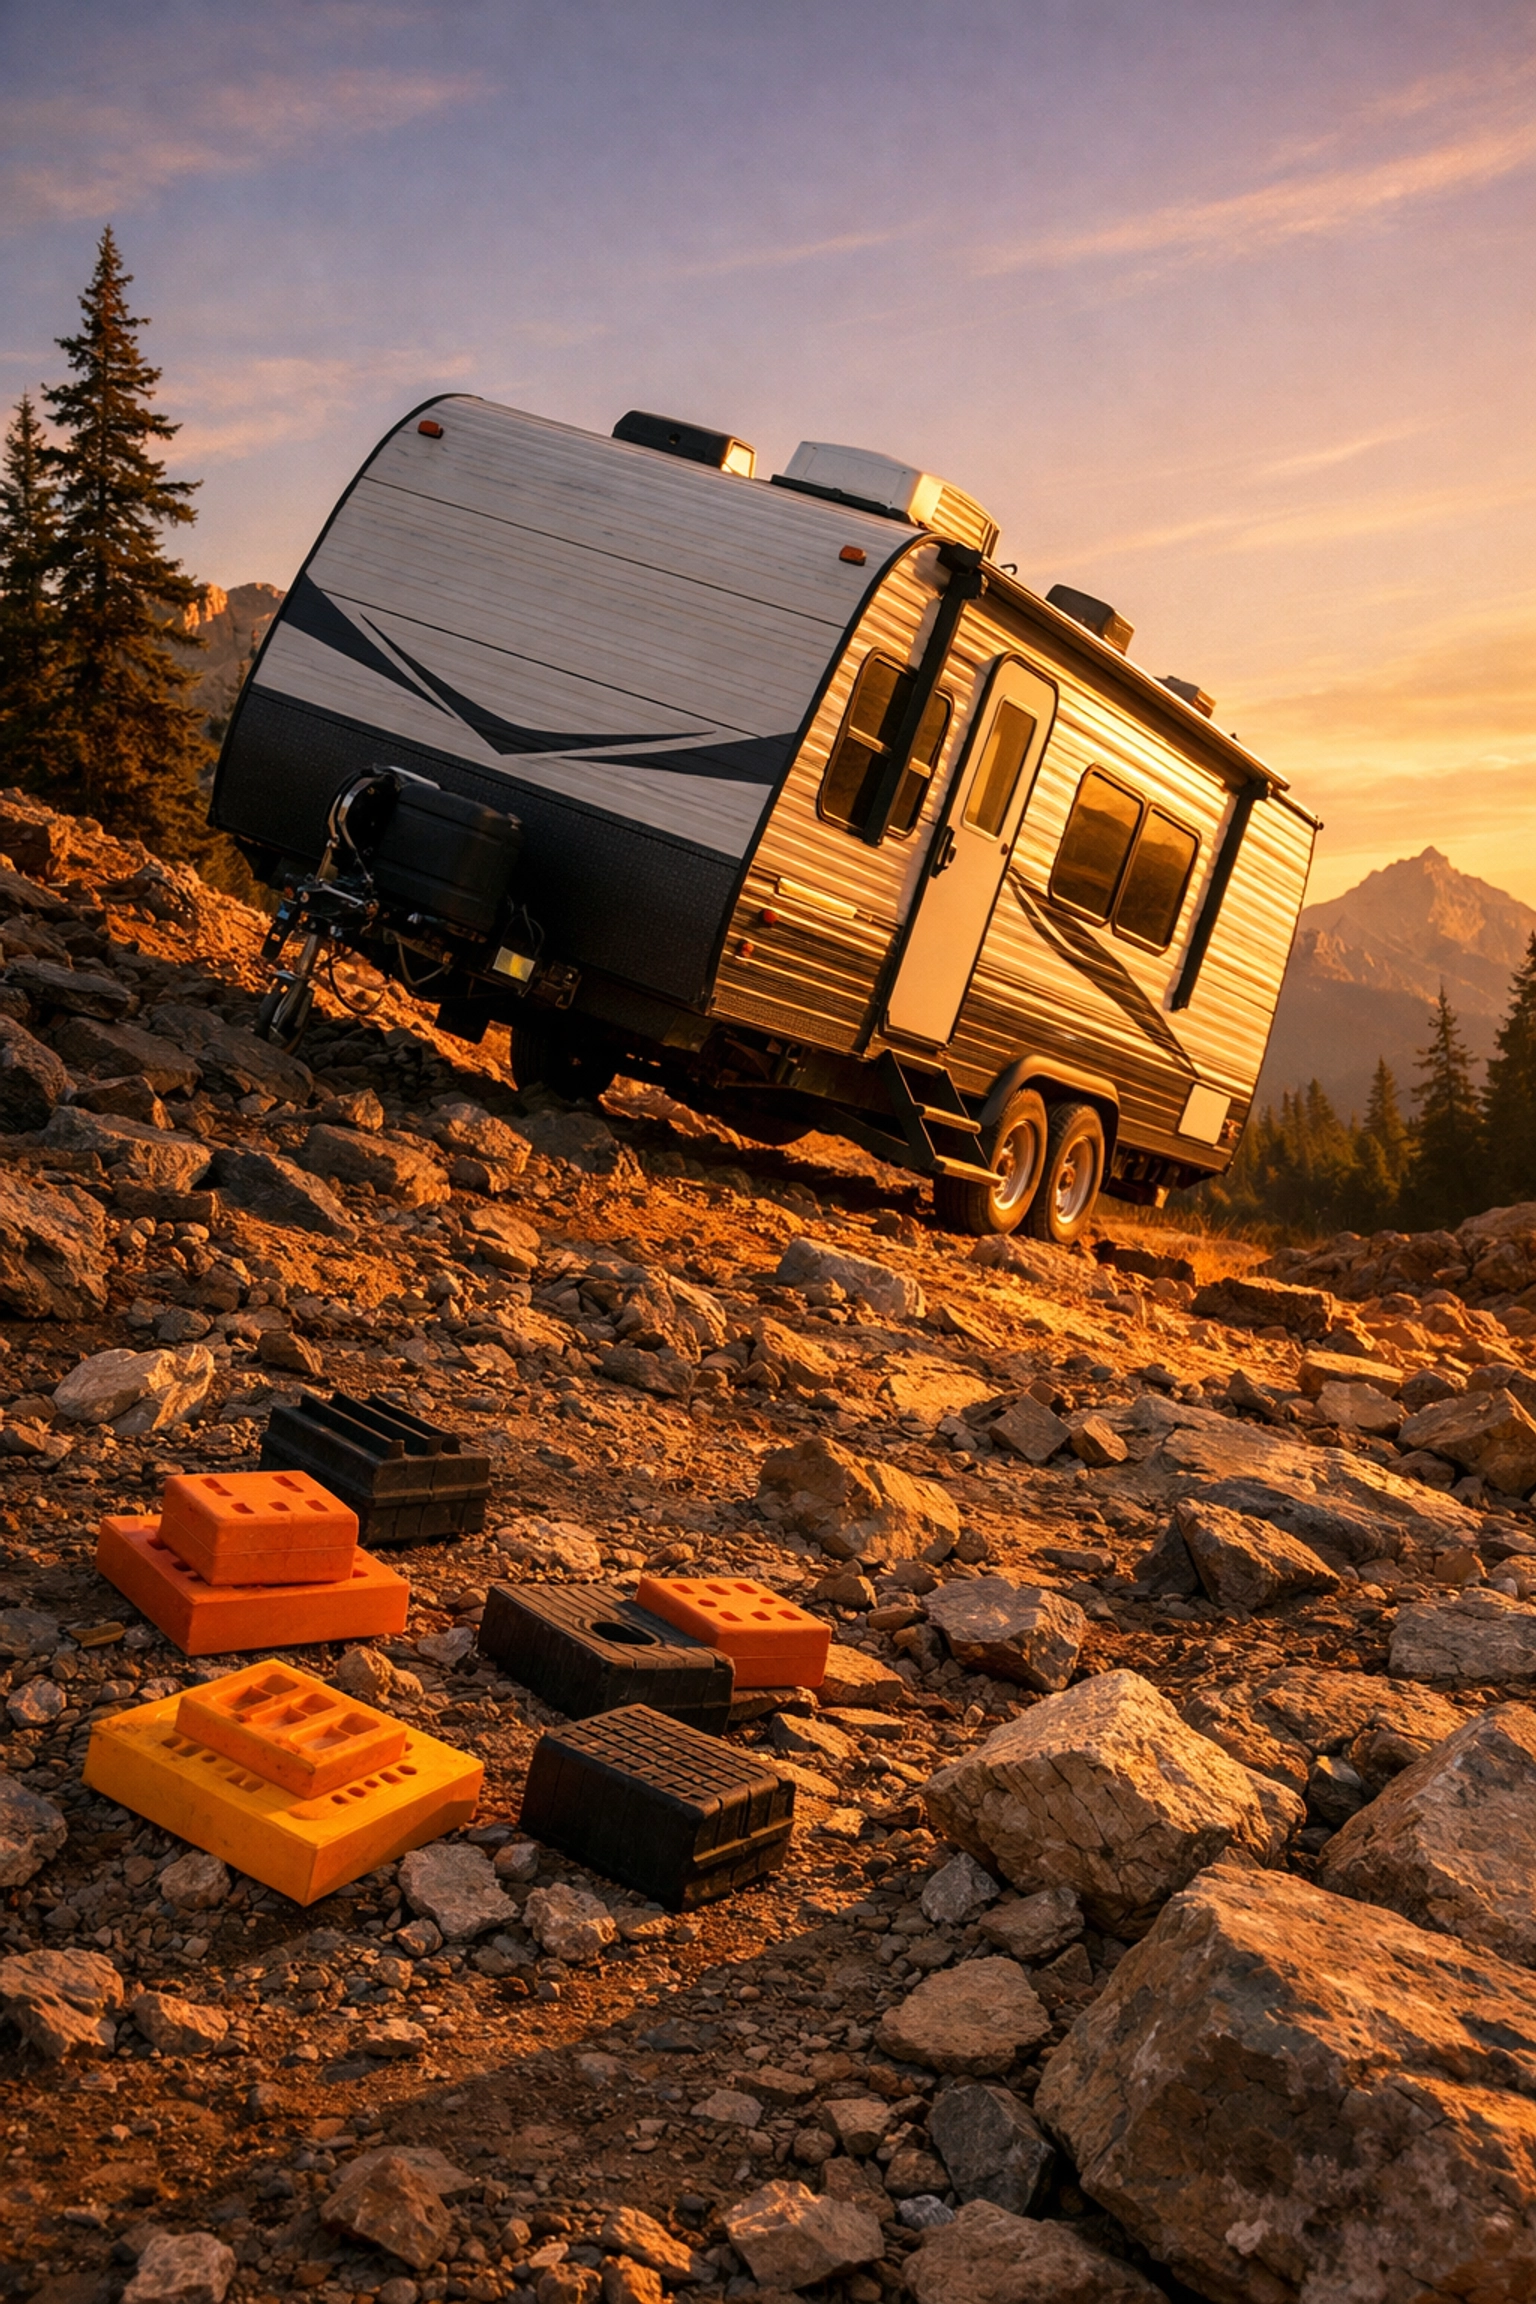
Don’t show up to an uneven campsite empty-handed. Here’s your essential kit:
Leveling blocks or ramps. Plastic stackable blocks are the gold standard. They’re durable, affordable, and won’t rot like wood. You’ll want at least 8-10 blocks per side. Curved ramps work too, but they’re less versatile.
A reliable level. Bubble levels work fine, but a digital level takes the guesswork out. Either way, you need one that reads both side-to-side and front-to-back angles.
Heavy-duty wheel chocks. Not the cheap plastic ones from the hardware store. Get solid rubber or aluminum chocks that can handle the weight. For a 24 ft camper weight trailer (usually 5,000-7,000 pounds), you need chocks that won’t slip.
Tongue jack capacity check. Make sure your jack can handle the tongue weight of your specific trailer. A 30 ft camper weight unit can have a tongue weight of 800-1,200 pounds or more.
Optional but helpful: jack pads for soft ground, a second bubble level for checking after each adjustment, and a spotter (your camping buddy) to help guide you.
Here’s where the rubber meets the road, or in this case, the leveling blocks.
Before you unhitch anything, walk the site. Identify the slope direction. Is it tilting left to right? Front to back? Both? This tells you where you’ll need blocks.
For a smaller 18 ft camper weight trailer, you might be able to reposition to find a flatter spot. With a 30-foot camper weight rig, you’re working with what you’ve got, these beasts don’t maneuver easily.
Park with your hookups in mind, but prioritize the flattest available position. It’s easier to run a longer water hose than to fight a severe slope.
This is critical: side-to-side leveling happens BEFORE you unhitch. Place your bubble level on the tongue or A-frame horizontally. Identify which side is low.
Stack your leveling blocks under the tires on the low side. For minor adjustments, 1-2 blocks is fine. If you need more than 3-4 blocks per tire, you should seriously consider repositioning the trailer entirely. Stacking blocks too high creates an unstable base.

Slowly back onto the blocks. Have your spotter watch the level and give you a thumbs-up when you’re centered. For an off-road travel trailer with heavy-duty suspension, you might need to account for compression once the trailer settles.
Once level, place wheel chocks on BOTH sides of each tire, not on top of the leveling blocks, but directly against the tires on the ground.
Now that you’re level side-to-side and chocked, you can unhitch. Raise the tongue jack until it takes the full weight of the trailer tongue. Then disconnect the safety chains, breakaway cable, and hitch.
For heavier trailers, especially in the 30 ft rv weight range, make sure your tongue jack is rated for the load. A cheap jack can fail catastrophically under this much weight on uneven ground.
Place your bubble level on the A-frame lengthwise. Crank the tongue jack up or down until the bubble centers. This is usually the easier part, but don’t rush it.
If you’re on soft or uneven ground, place a jack pad or flat board under the tongue jack foot before lowering it. This prevents it from sinking into dirt or gravel.
Here’s where people screw up: stabilizer jacks are NOT designed to level your trailer. They’re designed to reduce bounce and sway once the trailer is already level.
Lower each stabilizer jack in the four corners until they make firm contact with the ground. You should feel resistance, but you should NOT be lifting the tires off the ground. If you’re using stabilizers to lift the trailer, you’re doing it wrong and risking frame damage.
For a 30 ft camper weight trailer with slide-outs, improper stabilization can lead to binding, leaks, and structural stress on the slides themselves.

Deploy slide-outs only AFTER the trailer is fully level and stabilized. Extending them on an unlevel platform puts unnecessary strain on the motors and seals.
Set up your awning, connect utilities, and do a final walk-around. Check that all jacks are secure, chocks are in place, and nothing looks wonky.
Here’s a quick reference you can print or save on your phone:
Ground Assessment:
Side-to-Side Leveling:
Front-to-Back Leveling:
Stabilization & Final Checks:
Let’s talk about what NOT to do, because these mistakes are expensive.
Mistake #1: Using stabilizers to level. This is the most common error. Stabilizer jacks aren’t load-bearing, they’re not designed to support the average weight of camper models, especially larger units. Using them to level can bend your frame, crack welds, or snap the jacks entirely.
Mistake #2: Stacking unstable blocks. If your block tower looks like a game of Jenga, you’ve gone too far. Move the trailer instead. Unstable leveling blocks can shift or collapse, especially with the weight of a 24 ft camper weight trailer or larger.
Mistake #3: Leveling after slides are out. Extending slide-outs on an unlevel trailer puts stress on the mechanism and can cause binding or seal damage. Always level first, then extend.
Mistake #4: Skipping wheel chocks. Even on “level” ground, trailers can roll. On a slope, it’s a recipe for disaster. Chock every time, no exceptions.
Mistake #5: Ignoring ground conditions. Soft dirt, gravel, or sand can shift under the weight of your trailer. Always use jack pads or boards to distribute the load.
Side-to-side leveling: Adjusting the trailer so it’s horizontally level from left to right. This is always done first, before unhitching.
Tongue jack: The manual or electric jack mounted on the trailer tongue, used to raise and lower the front of the trailer for hitching and front-to-back leveling.
Stabilizer jacks: Corner jacks that reduce bounce and movement after the trailer is level. They are NOT for leveling or lifting.
Leveling blocks vs ramps: Blocks are stackable plastic or wood pieces; ramps are curved inclines. Both work, but blocks offer more precise control.
Sloped gravel sites: Common at developed campgrounds with drainage considerations. Use extra blocks and jack pads to prevent sinking. Average travel trailer weights (especially in the 30 ft range) can compress gravel quickly.
Soft ground after rain: Off-grid or dispersed campsites often have soft, muddy ground. Wide jack pads are essential, and you may need to reposition if the ground settles overnight.

Off-road or dispersed campsites: This is where an off-road travel trailer shines. You’ll encounter rocks, roots, and serious slopes. Take your time, assess carefully, and don’t be afraid to use a lot of blocks or reposition entirely. For a 16 ft camper weight trailer, maneuverability is your friend, use it.
Can you level a travel trailer on very uneven ground?
Yes, but there are limits. If you need more than 3-4 leveling blocks stacked per tire, the site is too uneven. At that point, reposition the trailer or find a different spot. Excessive stacking creates instability and safety risks.
Do you level before or after unhitching?
Side-to-side leveling is done BEFORE unhitching while the trailer is still attached to your tow vehicle. Front-to-back leveling is done AFTER unhitching using the tongue jack.
How unlevel is too unlevel for a travel trailer?
Most RV refrigerators can tolerate about 3 degrees off level, but you should aim for less than 2 degrees. If your bubble level shows the bubble outside the center lines, you’re too far off. Slide-outs and appliances will suffer long-term damage if operated consistently unlevel.
Can stabilizer jacks replace leveling blocks?
Absolutely not. Stabilizer jacks are designed to reduce movement and bounce, not to level or lift the trailer. Using them for leveling can damage your frame, bend the jacks, and create a dangerous setup. Always use leveling blocks for height adjustments.
Leveling on uneven ground takes practice, patience, and the right equipment. Whether you’re setting up a compact 18 ft camper weight trailer or a full-size 30 ft rv weight unit, the process is the same: assess, level side-to-side, unhitch, level front-to-back, and stabilize. Skip steps or rush the process, and you’re risking damage to your investment.
For more tips on setting up and maintaining your trailer, check out our guide to off-road trailer maintenance or explore the benefits of living the RV lifestyle.