Your cart (0)
Your cart is empty
Tax included and shipping calculated at checkout
Your cart is empty
Tax included and shipping calculated at checkout

If your RV slide out won’t extend or retract, it’s usually related to power, alignment, or safety system issues. Most problems can be pinpointed through systematic troubleshooting.
RV slide outs are complex mechanical systems that rely on precise electrical control and adequate power supply. When they malfunction, the issue typically stems from one of several common causes: insufficient battery power, blown fuses, motor failure, or physical obstructions. Understanding how these systems work and following a methodical diagnostic approach can save you time, money, and potential damage to your RV.
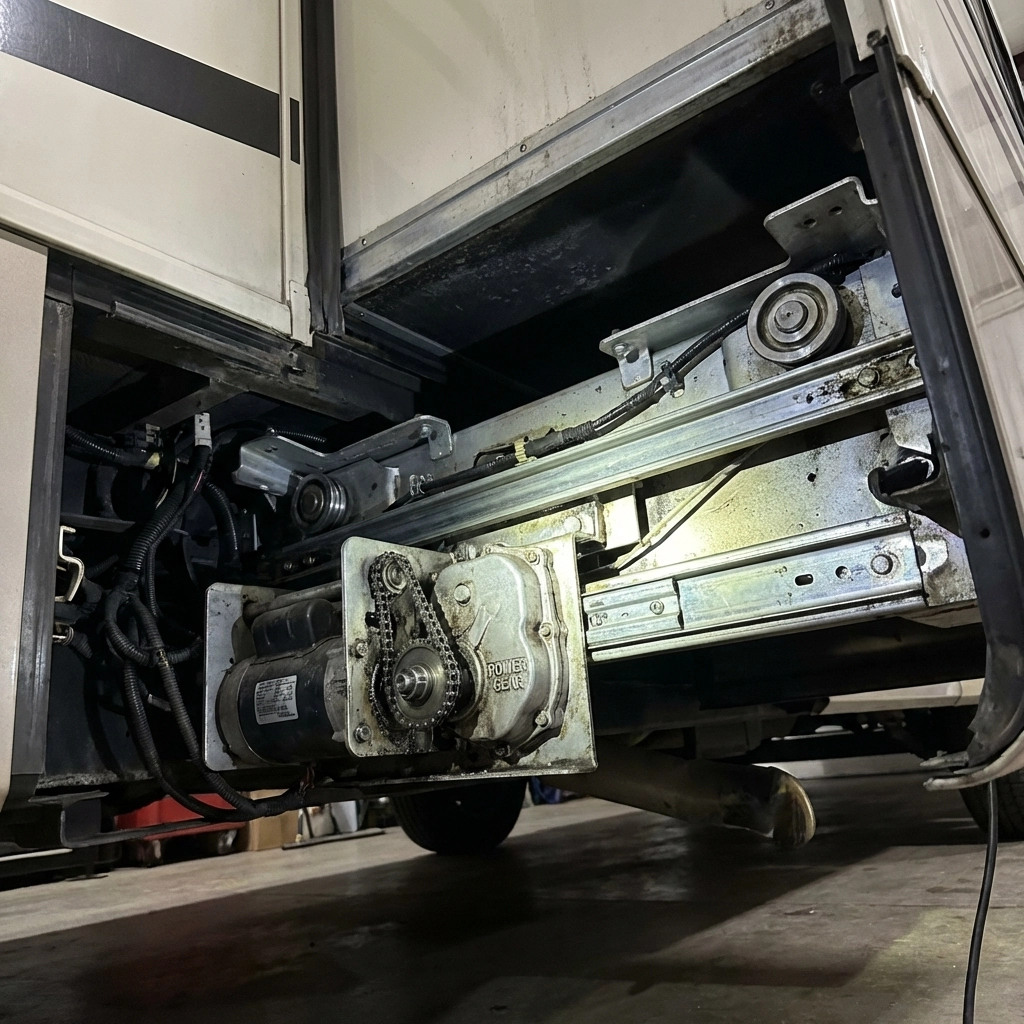
RV slide out systems come in two main types: electric and hydraulic. Electric systems use a 12-volt motor connected to a gear drive mechanism that moves the slide along rails or tracks. The motor receives commands from a control switch inside the RV and is powered directly from your RV’s battery system.
Hydraulic slide outs use an electric pump to pressurize hydraulic fluid, which then powers cylinders that extend and retract the slide. These systems require adequate hydraulic fluid levels and depend on proper pressure to function correctly.
Both systems rely heavily on your RV’s electrical system. They require sufficient battery voltage, typically 12 volts or higher, to operate the motors or pumps effectively. When battery voltage drops below optimal levels, slides may move slowly, stop mid-operation, or refuse to move at all.
The control modules in modern RVs include safety features that prevent operation under certain conditions, such as when the RV is not level or when system diagnostics detect potential problems. Understanding these safety lockouts is crucial for effective troubleshooting.
Operating an RV with a malfunctioning slide out poses significant safety risks that every owner should understand. A slide that’s partially extended creates an unbalanced condition that can affect your RV’s handling, especially in windy conditions or during emergency maneuvers.
Never attempt to drive with a slide out partially extended. The aerodynamic drag and structural stress can damage both the slide mechanism and your RV’s frame. Additionally, most slides are not designed to withstand the forces encountered during highway travel when extended.
If your slide becomes stuck in the extended position, you must retract it before moving the RV. This may require emergency manual override procedures, but attempting to force a slide closed can cause expensive damage to the motor, gears, or structural components.
Stop operating the slide immediately if you hear unusual grinding, clicking, or squealing noises. These sounds often indicate mechanical problems that will worsen with continued operation. Similarly, if the slide moves unevenly or appears to bind at certain points, discontinue use until you can identify and resolve the underlying issue.
When a slide out shows no signs of movement despite operating the switch, the problem usually lies in the electrical system. The most common culprit is insufficient battery voltage. RV slide out motors require substantial power to overcome the initial resistance of moving the slide, and weak batteries simply can’t provide the necessary amperage.
Blown fuses represent another frequent cause of complete slide failure. Slide out systems typically use high-amperage fuses (often 20-40 amps) that can blow due to power surges, short circuits, or simply age-related failure. These fuses are usually located in your RV’s main electrical panel or near the slide out motor itself.
Faulty control switches or modules can also prevent slides from operating. The switch sends a signal to the control module, which then activates the motor. If either component fails, no power reaches the motor despite having good batteries and intact fuses.
A slide that stops partway through its travel cycle often indicates power-related issues or physical obstructions. Low battery voltage is the primary suspect, as batteries weaken during the extension process, they may lack sufficient power to complete the full cycle.
Physical obstructions can cause slides to bind and stop moving. Common culprits include debris in the tracks, items stored too close to the slide mechanism, or camping gear inadvertently placed in the slide’s path. Even small objects like tent stakes or camping chairs can prevent proper operation.
Misaligned tracks or rails can also cause binding. This often occurs after driving on rough roads or when the RV isn’t properly leveled during setup. The slide mechanism depends on precise alignment to move smoothly along its intended path.
Jerky or uneven slide movement typically indicates lubrication problems or mechanical wear. The rails and tracks require proper lubrication to ensure smooth operation, but over time, dirt and debris can accumulate, creating friction points that cause irregular movement.
Track binding occurs when the slide mechanism becomes misaligned or when foreign objects interfere with the smooth operation of the rails. This creates resistance that manifests as jerky movement or complete stopping at specific points in the slide’s travel.
Worn rollers or slide shoes can also cause uneven movement. These components bear the weight of the slide and facilitate smooth travel along the rails. As they wear, they create increasingly rough surfaces that impede proper operation.
When you can hear the motor running but the slide doesn’t move, the problem usually involves the mechanical connection between the motor and the slide mechanism. Stripped gears within the motor assembly can cause this condition, the motor spins freely but can’t transfer power to move the slide.
Broken shear pins represent another common cause. These safety devices are designed to break under excessive load to prevent more expensive damage. When they fail, the motor operates normally but can’t engage the slide mechanism.
Drive belt failures in some systems can create similar symptoms. If the belt that connects the motor to the gear drive breaks or slips, the motor will run without moving the slide.

Begin your diagnosis by testing your RV’s battery voltage using a digital multimeter. With no load applied, batteries should read at least 12.6 volts for lead-acid batteries or 13.2 volts for lithium systems. Under load (while operating the slide), voltage should not drop below 12.0 volts.
If voltage is low, charge your batteries fully before proceeding with further diagnosis. Many slide out problems resolve once adequate power is restored. Connect to shore power or run your generator to ensure maximum charging input.
Test the voltage at the slide out motor while someone operates the switch. You should see full battery voltage at the motor terminals when the switch is activated. If voltage is present at the batteries but not at the motor, you have a wiring or connection problem.
Locate your RV’s main electrical panel and identify the fuses or breakers that protect the slide out system. Most RVs have dedicated fuses for each slide out, typically ranging from 20 to 40 amps depending on your system.
Remove each fuse and inspect it visually for blown elements or signs of overheating. Even fuses that appear intact can fail internally, so test them with a multimeter or fuse tester. Replace any questionable fuses with the exact amperage rating specified in your owner’s manual.
Test the slide out switch by checking for voltage output at the switch terminals while operating the controls. A faulty switch may show proper input voltage but fail to send signals to the motor. Consider bypassing the switch temporarily with a jumper wire to isolate switch-related problems.
Perform a thorough visual inspection of the slide out rails and tracks on both sides of the RV. Look for debris, bent components, or any objects that might interfere with smooth operation. Pay particular attention to areas where the slide assembly contacts the rails.
Check the slide mechanism’s alignment by observing how it sits in the rails. Misalignment often becomes apparent when comparing both sides of the slide or when examining the gap between the slide and the RV body. The gaps should be even across the entire length of the slide.
Inspect the exterior seals and weather stripping around the slide. Damaged or displaced seals can bind against the RV body and create enough resistance to prevent proper operation. Ensure all seals are properly positioned and not interfering with slide movement.
Access the slide out motor, which is typically located underneath the RV or inside a basement storage compartment. Check all wire connections at the motor for tightness and signs of corrosion. Loose connections can create resistance that prevents proper motor operation.
Test the motor directly by applying 12-volt power with jumper cables, bypassing the RV’s control system. If the motor operates normally with direct power, the problem lies in the control circuitry. If the motor fails to operate with direct power, it likely needs replacement.
Examine the motor’s gear case for obvious damage, leaking lubricant, or signs of mechanical failure. Listen carefully to the motor when it’s operating, grinding or unusual noises often indicate internal mechanical problems that require professional repair.
Once you’ve identified and corrected the problem, test the slide operation several times to ensure consistent performance. Operate the slide through its full range of motion, paying attention to smooth operation and proper sealing when fully retracted.
If you had to manually override the slide system, verify that all manual controls are returned to their normal positions before attempting powered operation. Some systems require specific reset procedures after manual operation.
Test the slide under various conditions, including when the RV is level and slightly unlevel, to ensure the system functions properly in real-world camping scenarios.
Manual override should only be used when the slide is stuck in the extended position and you need to retract it for travel. This procedure varies significantly between manufacturers and slide out systems, so always consult your owner’s manual for specific instructions.
Most electric slide systems have a manual override that allows you to disconnect the motor and manually operate the slide mechanism. This typically involves removing a cover panel to access manual controls or using a hand crank provided by the manufacturer.
Exercise extreme caution during manual operation. Slide outs are heavy and can cause serious injury if not handled properly. Always ensure adequate manpower and support before attempting to manually move a slide. Never force a slide that shows significant resistance, as this can cause expensive damage to the mechanism or RV structure.
Some hydraulic systems require different override procedures, often involving manual operation of relief valves or using backup hand pumps. These procedures can be complex and may require specialized knowledge to perform safely.

Regular maintenance represents your best defense against slide out problems. Establish a routine inspection schedule that includes checking the rails and tracks for debris, inspecting seals for damage, and testing slide operation at least monthly during active use seasons.
Lubricate slide rails and mechanisms according to your manufacturer’s recommendations. Use only approved lubricants, many household lubricants can attract dirt and debris that actually worsen operation over time. Typically, dry lubricants or specialized RV slide lubricants work best.
Maintain your RV’s electrical system by keeping batteries properly charged and testing your charging system regularly. Weak electrical systems cause the majority of slide out problems and can lead to expensive motor or control system damage.
Choose camping sites that allow for proper RV leveling. Slides operate best when the RV is reasonably level, and significant out-of-level conditions can cause binding, uneven wear, and premature component failure.
Store your RV with slides retracted when possible. Extended storage with slides out can lead to seal deterioration, structural stress, and increased risk of weather-related damage.
Operating slides on weak batteries represents the most common mistake RV owners make. Many assume that if the engine starts or lights work, the batteries have sufficient power for slide operation. Slide motors require substantial amperage and will not operate properly on weak batteries.
Ignoring early warning signs like unusual noises, slow operation, or intermittent problems often leads to more expensive repairs. Address small problems immediately before they escalate into major mechanical failures.
Using incorrect lubricants or over-lubricating slide mechanisms can cause more problems than it solves. Heavy greases and oils attract dirt and debris that can bind moving parts. Follow manufacturer specifications for lubricant types and application frequency.
Forcing slides manually without understanding proper procedures can cause significant damage to motors, gears, and structural components. When slides resist movement, identify and address the underlying cause rather than applying more force.
Why is my RV slide out not working at all?
Complete slide failure usually indicates electrical problems. Check your battery voltage first, it should be at least 12.6 volts. Then inspect fuses, wiring connections, and the control switch. If power is reaching the motor but it’s not running, the motor itself may have failed.
Can a bad battery cause slide out problems?
Yes, weak batteries are the most common cause of slide out problems. Slide motors require substantial power to operate, and batteries that seem adequate for lights and other systems may still lack sufficient capacity for slide operation. Test under load while operating the slide.
Is it safe to manually push or pull a slide out?
Manual operation should only be attempted using manufacturer-approved procedures and tools. Never force a slide by hand without following proper override protocols. Slides are extremely heavy and can cause serious injury. Always consult your owner’s manual for specific override instructions.
How do I reset my RV slide out system?
Reset procedures vary by manufacturer. Most systems require turning off the main power, waiting several minutes, then restoring power. Some systems have specific reset buttons or require cycling the slide control switch in a particular sequence. Check your owner’s manual for model-specific reset procedures.
When should I call a professional for slide out repairs?
Contact a professional if you’re uncomfortable working with electrical systems, if manual override procedures seem complex or dangerous, or if initial troubleshooting doesn’t resolve the problem. Also seek professional help for any repairs involving hydraulic systems or structural modifications.